
First of all - I've been really REALLY taking a step back from cardmaking. It's not that I don't love making cards, but lately I've really been trying my hand at lots of other crafty things! I'm still working with some paper, but I'm also branching out more into things involving fabrics and mixed medias. =)
One of my big inspirations (as many of you could probably guess) has been Pinterest! So this is going to start a series of posts I'm calling "The Pinterest Project." I'm on a mission to make fun and easy DIY projects for $20 or under! Many of my projects (like this one) will be MUCH cheaper than that even!!! =D
So one of the ideas that I got from Pinterest was THIS POST that shows some really awesome shadow boxes that are dedicated to tickets from events that you have been to! I had an idea to try and make one on my own, and it turned out REALLY great! Here's the products that I used:
- An 8x11 shadowbox from Michaels (originally $10 but I got it 40% off for $6)
- One piece of PTI's Smokey Shadow Cardstock (any similar gray cardstock retails for about $1/piece at most)
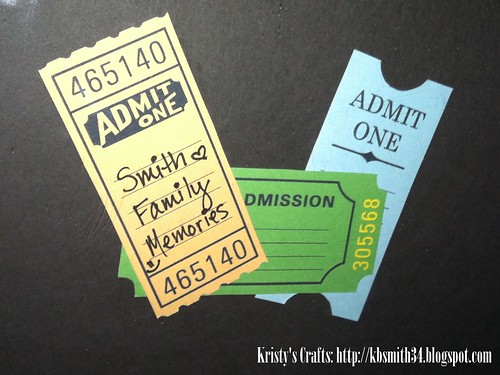
- Some awesome free printable tickets that I printed myself (free!)
- Silver and Gold Ribbon from Really Reasonable Ribbon (retails for $1.25 for 5 yards, so $2.50 for WAY more than you'd need)
- A permanent black marker or ink pen (I had this product)
- Various adhesives that I already had (Tombo Permanent Adhesive for the ribbon, Tombo Aqua Liquid Glue to attach the cardstock to the back of the shadowbox, and a Zig 2-Way Glue pen to adhere the tickets to the cardstock)
- I also used an x-acto knife and my hubby helped me with a jigsaw to cut the slit in the top of the shadowbox!
I started by taking apart the shadowbox and measuring out the slit on the top of the box. I used my x-acto knife to outline the slit in the top of the box, and then my husband cut it out for me! I made my slit 4" by .75" - which I figured would be large enough for most of the tickets I'd want to put into the box!
Next, I started on the background of the shadowbox! I cut down the cardstock to fit the back of the box. Then I printed out the tickets and cut them out as well. I arranged the tickets on the top of the box and adhered the ribbons to the bottom of the cardstock. Once everything was glued down I glued the cardstock to the back of the shadowbox. Because the Tombo Aqua Liquid Glue needs time to set without curling the paper, so I put a heavy book on top of the back of the box while it dried.
Once the glue was dry, I wrote "Smith Family Memories" on one of the tickets! =) Now my shadowbox is ready to be hung up and used! We plan on using ours for sporting tickets, movie tickets, concert tickets, and other festival/event tickets since we are always doing things like food festivals and beer festivals etc! Here's a picture of the finished product:

Because it's a shadowbox, I had a hard time photographing the details on the tickets in the entire box, so here's a closeup of the tickets:
Have a craft-tastic day! =D


No comments:
Post a Comment