
So EVERYONE who loves DIY has seen many places with these little DIY Magnet Boards, and I have several pinned as well! I basically took the idea and started from scratch! I got a GREAT product that is fun and very versatile! Best of all, you can make it from using MANY things that you already have! I did one completely from scratch and one with minimally purchased materials! My DIY from start to finish is on the one that I bought everything for, so here goes:


1. A flat (or almost flat) cookie sheet! I got mine at Ollies and paid $2.99 for it!
2. Fabric for the front and back. My front fabric is a fat quarter from JoAnns that was 40% off ($1.29) and the back fabric was on clearance so I got a half yard for $2.25 and I can still make at least THREE more backs with that.
3. Various trinkets to make magnets with (I often go through Michaels $1 bins) - total purchase price for these goodies was $4.
4. Magnets to fit your items from #3. I had the black ones already but retail this would cost about $4 with coupons.
5. Spray adhesive and various other adhesives all of which I had (I used E6000 to attach the magnets and around the corners of the back) The glossy accents and the white puffy paint I used to enhance the glossiness of the white photo frame.
6. FLAT Ribbon or cord to hang the project (use what you have.)
So in total, this project cost me about $16. But when I used fabrics and buttons/jewelry that I already had to make it, it was closer to $8! =)
Ok! So now it's time for the assembly! Here's what I did:
To start, iron all of your fabrics, cut them to size based on the size of your cookie sheet (add 2 inches to each side for the front and 1/2 inch to each side of the back when you cut). Also, if your cookie sheet has a raised edge, you can use a rubber mallet to pound it flat if you like. Also, make your magnets!
Now, here's the instructions on the magnet board itself:

1. Use spray adhesive on the front of the cookie sheet. Lay the fabric down starting at the top and carefully pressing as you go down to make sure there are no air pockets or wrinkles.
2. Turn your cookie sheet over and spray adhesive on the outer inch of each side. Flatten the sides and leave each corner until all of the sides are down.
3. Spray each corner and carefully fold down the corners tightly to get nice, rounded edges.
4. Add your cord or ribbon. I added mine with just several pieces of regular packing tape since I'm going to finish the back.

5. Take the back piece and iron down about 3/4" on each side. Snip the corners so that they look mitered.
6. Once you have pressed the hems down sufficiently, take the corners and press them down towards the middle as shown.
7. Press the fabric from the front to get out any wrinkles AND to secure the hems.
8. Use spray adhesive to attach the backing to the cookie sheet. The edges, corners, and ribbon area will not connect with the spray adhesive well, so use another adhesive (E6000, Tacky Glue, etc) on those areas and set something on them until they are glued down well.
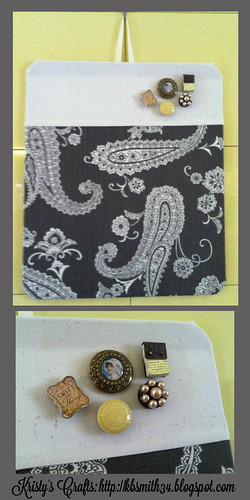
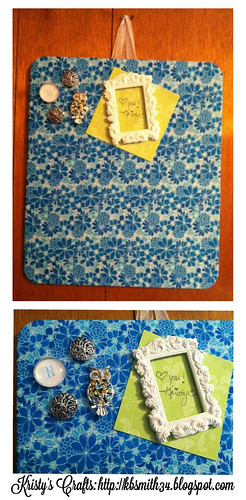
And then you have your magnet board! I have made two of these so far, and BOTH were great gifts for friends and family!!! Here's the finished products:


As you can see I did go back and make one more custom button for my board since that one was for my sister! =) Also, on the paisley board I didn't hammer down the raised edge of the cookie sheet but it still looks just fine! Thanks for reading and as always leave me some feedback! Happy blogging! =)
As you can see I did go back and make one more custom button for my board since that one was for my sister! =) Also, on the paisley board I didn't hammer down the raised edge of the cookie sheet but it still looks just fine! Thanks for reading and as always leave me some feedback! Happy blogging! =)


No comments:
Post a Comment